Entries by Brooke (278)

Saturday
Jan172009

color story #5

I have always been a fan of light and bright teals paired with red. The teals can even be more on the bluer side, like the bottom right swatch, but you have to stay clear of bright blues or it starts to feel a little Fourth of July. I love this pairing so much I once did an entire identity in it for photographer Lisa Hubbard. (she's wonderful, by the way)


More to come on what I've been using this stack for...

Friday
Jan162009

this week's library book

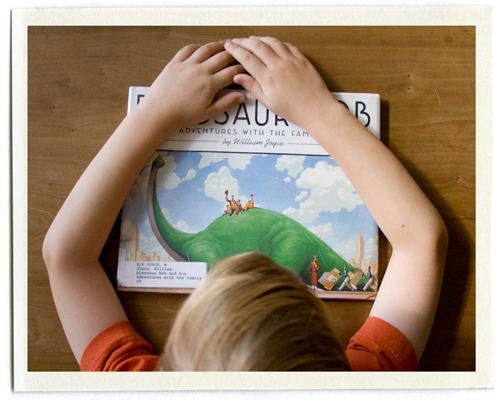
Forgive me for not posting more of our finds at the library. I got a little distracted with the holidays, but we are now settling back into our normal routine. Have you met Dinosaur Bob? If not, let me introduce you.

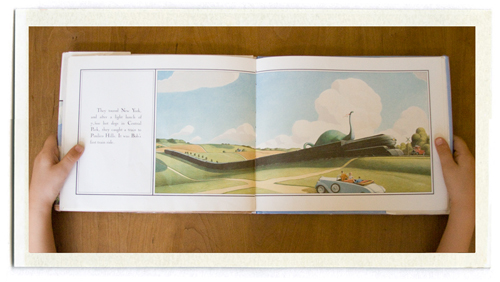
Dinosaur Bob and His Adventures with the Family Lazardo is a lovely little book written and illustrated by William Joyce. The Lazardo family find Bob during safari in Africa (they are quite the globetrotters). When little Scotty asks dad if they can keep him, he replies "I don't see why not." 

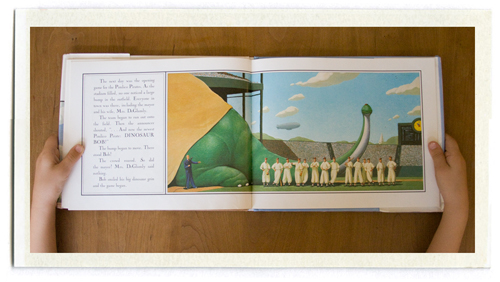
So Dinosaur Bob comes home to live with the Lazardos in Pimlico Hills. He makes a lovely pet.. he can play the trumpet and even scare away burglars. But his biggest love is baseball, and he's got one heck of a swing.

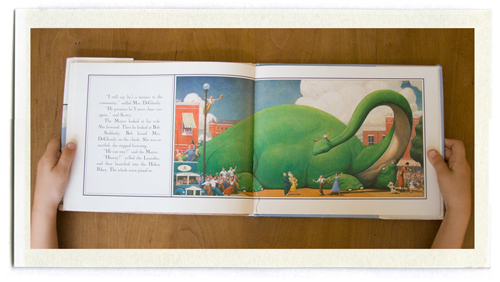
After a bit of trouble, he earns a spot on the local baseball team, the Pimlico Pirates. And in due time Bob wins the whole town over, even the mayor's cranky wife.

Do you know what I love most about this book? I love the Lazardo family. They are always singing and dancing and going on adventures and just having so much fun as a family.. even if it's just eating dinner on the porch or doing a quick hokey pokey. I'd like my little family to be a bit more like them. 

Thursday
Jan152009

anna and mason


They've been going through their archives over at Martha Stewart Weddings and have added so many beautiful weddings to the site. A recent addition is the wedding of Anna Williams and Mason Adams. Anna is one of the nicest people you will ever meet, and an amazing photographer, and I had the pleasure of working with her countless times while I worked at Martha Stewart Living and Martha Stewart Kids. (She is also the photographer of both of Joelle's books).

I was completely thrilled when she asked me to help with her wedding invitations. Anna had assembled a gorgeous color story.. bright oranges, magentas, peaches, and soft pinks. We letterpressed the invite in three colors, with each letter a different color (which proved to be a bit of a nightmare for our printer, but the results were really beautiful!). We also letterpressed a gingham liner for the envelope. The colors in the magazine printed a bit dark, but you can see the actual colors of the invite below.

It's always a fun process to create a new wedding invitation, something unique that represents the personalities (and sometimes the quirks) of the couple getting married. I find it easier to design invitations for people I know, when I have a pretty good sense of who they are and exactly what they are hoping to see for their wedding. For Anna, I wanted her wedding to be as lovely as she is.. and I think we came close.

(photographs from the Winter 2008 issue of Martha Stewart Weddings)

Sunday
Jan112009

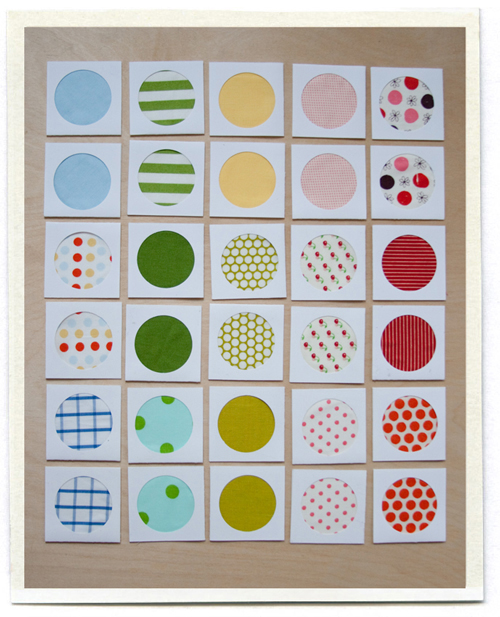
fabric scrap memory game

I promised a few more ideas using the technique from Jen + Ray's escort cards. One of our favorite games is Memory, we play it all the time. So why not make your own memory game using scraps of your favorite fabrics.

You'll need to dig through your scrap bin and find fabrics with a nice small repeat. I threw in a few solids as well. Try not to choose two fabrics that are very similar (you wouldn't want to pick a blue dot and a teal dot that could be mistaken for each other during the game). Print this template (each page will make 10 cards or 5 pairs) and follow the directions here to make your cards. 

The version I made has 30 cards (or 15 pairs) which is about perfect for my 4 year old (but a little challenging for Bee, who is almost 3). You can make the game harder or easier by adding or taking away pairs. I hope your little ones love it as much as mine do. When Bee plays, she says "Oooh!" when she flips over each square.

Disclaimer: I debated about laminating my cards to make them a little more durable, but then you lose the fabric texture which is really half the fun. If you pay careful attention when you are making them to spread your glue to all the edges and really press them together, I think your cards will last for quite a while. (Unless you leave them unsupervised with your 2 year old.. then all bets are off!)

Thursday
Jan082009

jen + ray

Remember this color story? It's still one of my favorites.

Now that the Winter 2009 issue of Martha Stewart Weddings is out, I can finally share what this color story was for... the wedding of my friend Jen Hoverson (Jen and her sister Joelle own Purlsoho). Jen's colors were orange and spring green, with a mix of prints and patterns thrown in.

The stationery was designed using green and orange dots with the couple's initials. Everything was letterpressed by Bryce Knudsen over at Bjorn Press (A fantastic letterpress studio if you are ever in the need for one..) The dotted paper was printed on a thin Japanese rice paper and used to wrap the invitations. The RSVP card had guests circle Y for Yes or N for No. We made the J and R coasters for the cocktail hour.

Menus were letterpressed and tucked into fabric napkins. Jen wanted to incorporate fabrics into her wedding (no surprise as the owner of a fabric store) and made napkins for each guest, with the help of her friends and family. Each table featured a different print in the orange and green spectrum. Each place setting also included a glass magnet with the guest's first initial. After the wedding, Jen took the napkins and made an amazing quilt from her sister Joelle's book "Last-Minute Patchwork and Quilted Gifts".

For the escort cards, we included a swatch of the fabric for that table. The Martha Stewart Weddings website has more information on how to make these cards, and a template you can download. I love these cards since they are a great way to use up leftover fabric scraps — I've already made them into Christmas tags. I have a few other ideas coming later this week!

See more photos of the beautiful couple here taken by the lovely Meg Smith. I was lucky enough to get to art direct the photo shoot of this wedding as well, and though it was a bit crazy running a shoot while an actual wedding was going on, working with Meg made it all the more enjoyable... she's lovely, as are her photographs.

Wednesday
Jan072009

super girl

Yesterday while getting dressed Bee decided she needed to wear her superhero costume from Halloween. Normally I would have tried to talk her out of it, but she's almost three, and has gotten pretty good at stating her case. And I figured, what's the harm.. she does make a pretty cute superhero.

We dropped C off at preschool and spent the morning running errands. Do you sometimes have a list of ho-hum things to do? Do you need to add a bit of excitement to your ordinary day? Then I suggest you spend an hour at Trader Joe's with a two year old in a superhero costume.

Never have I had so many people stop and say hello. People held doors for us, helped us navigate the always crowded aisles, reached to get things from top shelves. Little old ladies giggled, grumpy looking men suddenly smiled. One little girl about B's age even asked her is she was a Wonderpet.

When I was telling my husband about our morning, he recalled an episode of This American Life which we listened to a few weeks ago. Act 3 tells about a guy who dresses up in a hand-sewn Superman costume (he wears it in public as often as he can). Why would he do such a thing? I suggest you give it a listen.

Friday
Jan022009

for the love of a calendar

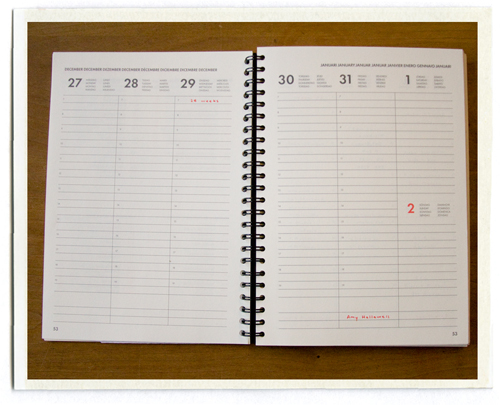
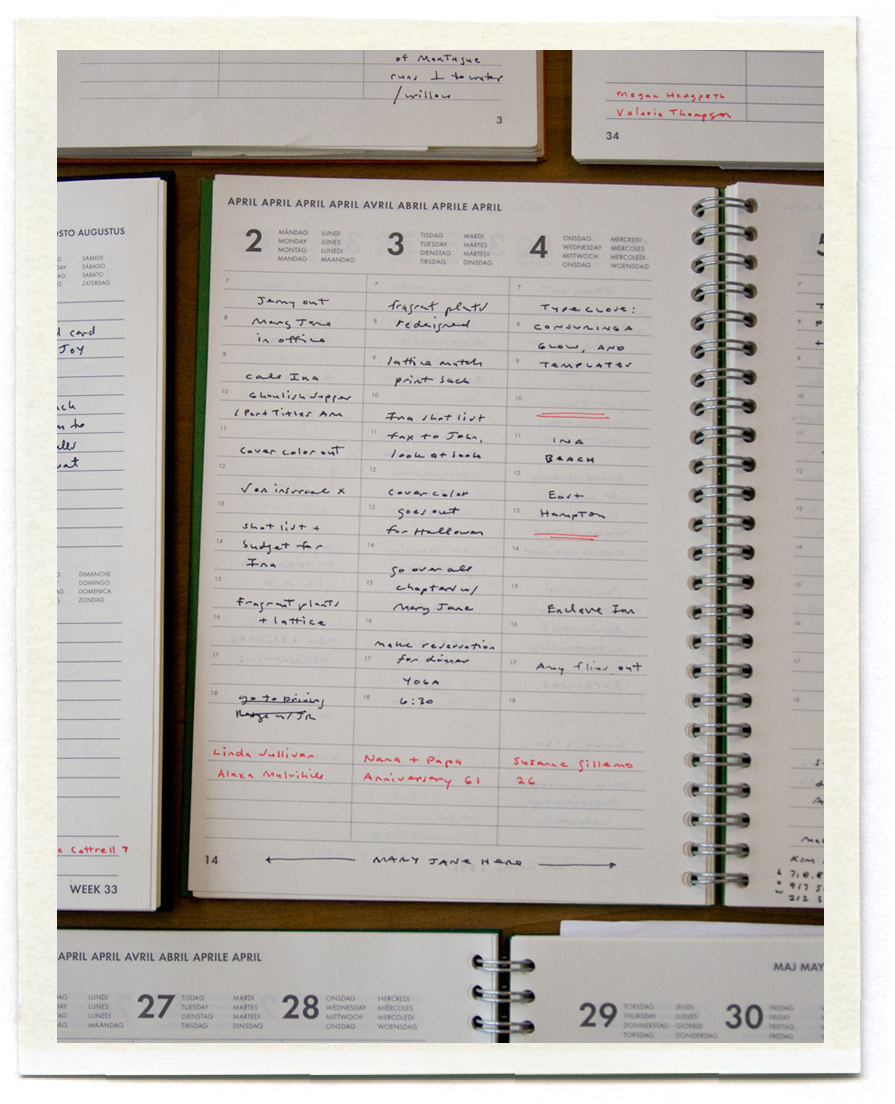
I love a new year, a fresh start, and best of all — a brand new weekly desk calendar. For a design geek like myself, it can't be just any calendar. Here's what works for me: 1) it needs to have one week per spread  2) it needs to lie flat when open, spiral-bound works best 3) each week must be divided into days, with ample space for writing in appointments, birthdays, etc  4) it can't be larger than 6" x 9" since it sits open on my desk all year long, and 5) it needs to look good.

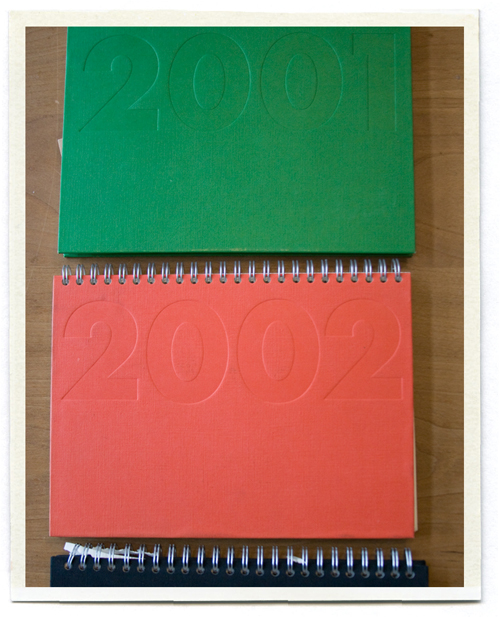
After years of buying all different kinds of calendars, I finally found the calendar of my dreams back in 2001. On my way home from work, I stumbled into the Ordning + Reda store on the Upper East Side and there it was...

The Ordning + Reda cloth diary. It was the perfect size. It came in an array of colors. It had the perfect amount of space between the lines for my tiny handwriting. The paper felt nice. It was beautifully designed (I love those little red numbers). And it was Swedish (everyone knows Sweden is the land of all things beautiful and well designed).   

For the next few years, all was well. I developed a little system with my calendars. Birthdays and anniversaries were written at the bottom of the page in red, appointments and other to do lists were written in black. In 2002, I got married. And JR started giving me a calendar for Christmas, a different color each year. 

And then a horrible thing happened. Ordning + Reda closed their US stores! But we were not deterred. In 2003 I found one at the Swedish import store in midtown, but they stopped carrying them soon after. Then JR found them at the Bodum store in the meatpacking district, and for the next few years I always found one waiting for me under the Christmas tree. But last year the Bodum store stopped carrying them, and as far as we know, they aren't available in the US anymore. Last year I protested and didn't have a desk calendar at all. But I miss it.

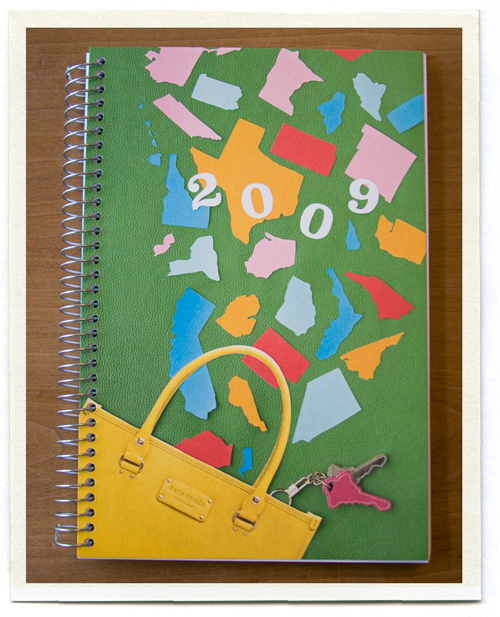
I've considered a few options, (like this, or this, or this, or this) and this year I decided to go with the Kate Spade weekly calendar. It meets all of my requirements (even if the lines are a bit too widely spaced for my writing) and though I don't love it the way I love my old calendars... it'll work.

 Now does anyone have a connection in Sweden who can hook me up for 2010?

Tuesday
Dec302008

the stockings — how-to

I'm so glad you like the stockings. Here are some steps on how to make them yourself. Remember that I am fairly new to sewing, so please be kind if I make a mistake here or there.. I am still learning as I go!

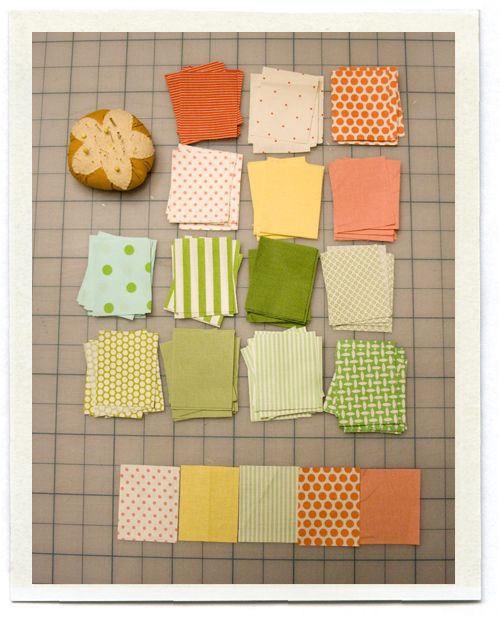
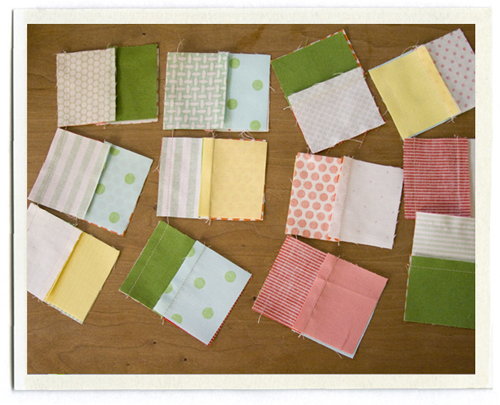
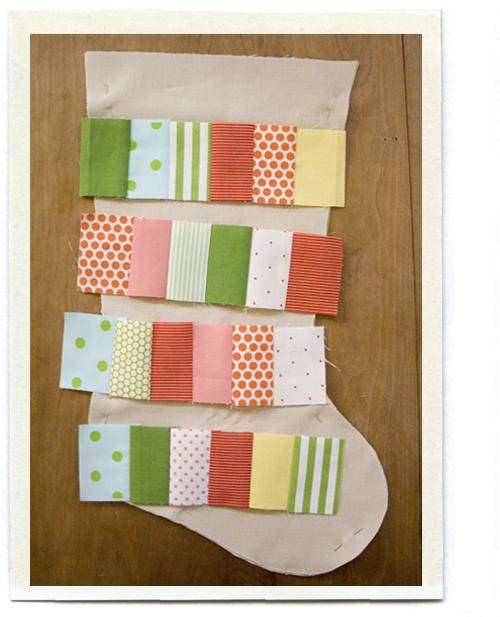
Step 1: Assemble a grouping of fabrics you think work together. Mix some fabrics that are a little busy (like the orange dots) with some on the quieter side (like the tiny red and white stripe). Cut them all down to the same size rectangle (mine are 2.5" tall by 2" wide). Start laying them out in a row, to see what looks nice next to each other (see bottom of the photo). The patchwork strip for each stocking is 6 blocks wide, so here's where you play around and figure out what looks best. You can choose to do the patchwork strip on the front and the back of the stocking (like me) or just on the front. 
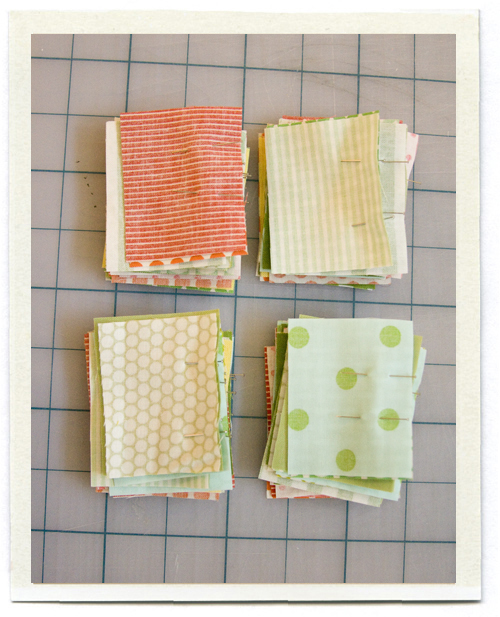
Step 2: Pin your blocks together for chain piecing. Starting at the beginning of each patchwork row, take two blocks and pin them together along the long side, right sides facing. I made a stack for each of my stockings. Try to keep your pairs in order.
Step 3: Now for chain piecing. Sew all your pairs together (check to make sure right sides are facing!) with a 1/4" seam. Just feed them in right after one another, leaving a few stitches between each one. (This is the best thing I learned from my quilting class at Purl Patchwork, thank you Joelle!) 
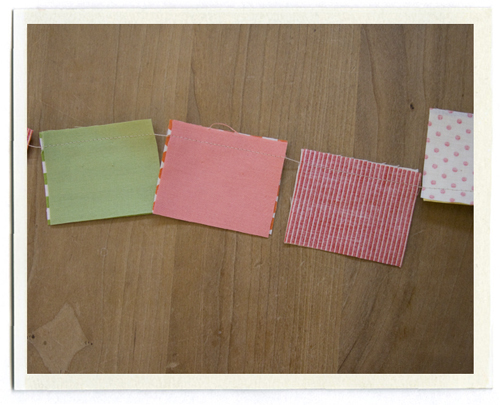
Step 4: Clip the threads off between your sewn pairs, and iron the seam allowances to the right or left (I iron mine to the darker side, so they won't show through). Lay out your pairs in order to make the patchwork strip, and make sure you like the order. This is your last chance to move things around.
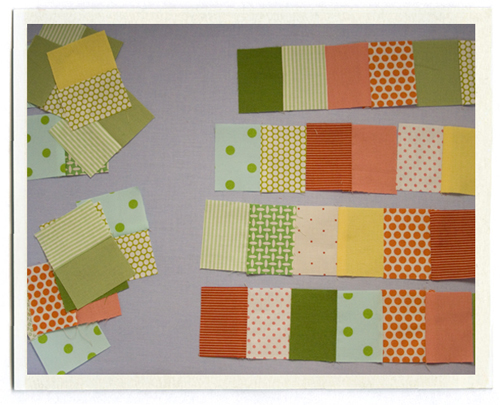
Step 5: Chain piece again, this time you're connecting the pairs you already chain pieced.. so these will be 4 blocks wide. I made a mistake at this point, chain piecing all of my pairs together. So when I sewed mine, they were all 8 blocks wide, and you only need them 6 blocks wide. If I were you, I would sew the first two pairs from a patchwork strip together (giving you 4 blocks wide) and then sew one more pair to the end, so it is 6 blocks wide. Repeat with the remaining rows.
Step 6: Arrange your strips for each stocking. Decide which strip will go on the front of the stocking, and which will go on the back. Look at the front strips all together and make sure they all look a little different.
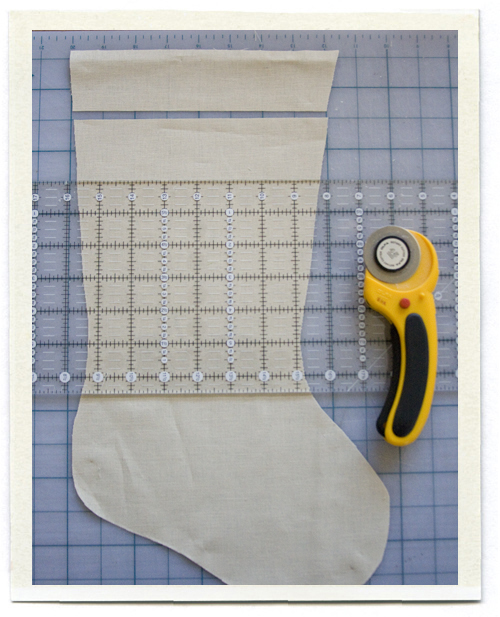
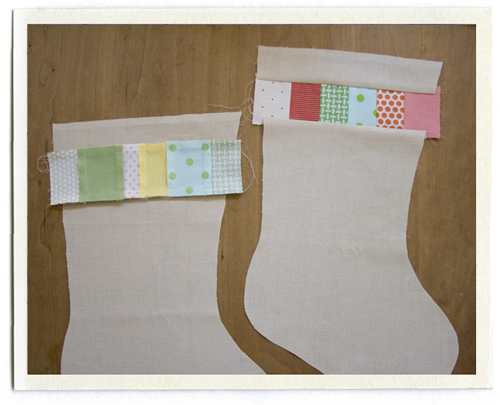
Step 7: Cut two pieces for the outside of each stocking (I just traced a stocking I had for the basic shape, adding a 1/2" seam allowance). I originally wanted to make these out of linen, but thought it looked a little gray next to my fabric, so I chose a linen cotton blend in a creamy tan color. You'll need to cut a strip out of your stocking to add the patchwork strip. Mine are 2.5" high, so you need to remove a 2" high strip (leaving you a 1/4" seam for the top and the bottom). In the photo below, the top strip will become the top of the stocking, and I'm going to cut where the top of the ruler is and remove that 2" strip. Rotary cutters are great for this.
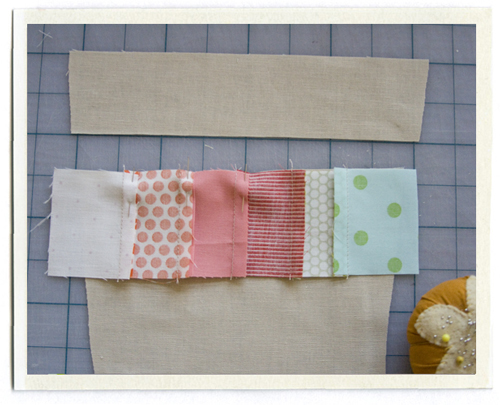
Step 8: Pin your patchwork strip in place, lining the bottom of your strip up with the cut edge of your stocking, right sides facing. I like to pin at each block's seam so you can make sure the seam allowances lay nice and flat as they go through the machine (just like Joelle taught me). Stitch with a 1/4" seam. Repeat on the top of the patchwork strip, attaching it to the top cut portion of your stocking.
Step 9: Press your seam allowances to the tan stocking side to reduce bulk, and iron around your patchwork strip, pulling on your fabric just a bit so all your creases are nice and crisp. In the photo below, the stocking on the right shows what the front or right side should look like, the one on the left shows the wrong or back side. Use your rotary cutter to trim off the excess bits at the right and left edge of your patchwork strips. You want the edge of your stocking to be one nice line so it will align with your lining.
Step 10: Now is the time to embroider your name under the patchwork strip on the front side of your stocking. Make sure you stop at least an inch before the edge to leave enough room for your 1/2" seam when you sew the stockings together. (I used two strands of standard embroidery floss, and I just make the letters up as I go..)

Step 11: I chose to line my four stockings with four different green fabrics. So when you cut out your front and back outer stocking pieces, cut a front and a back from your lining fabric as well. Grab your front and back stocking pieces and take a look at how they are matching up with the front and back lining pieces. Are they a little bit off? No big deal, just trim the edges with a rotary cutter so you can make them match.

When you get ready to stitch the stocking and lining together, lay your pieces in this order (pay attention because I did this wrong the first time) starting from the bottom: 1. lining front wrong side up, 2. stocking front right side up, 3. stocking back wrong side up, 4. lining back right side up. Starting at the top opening of the stocking, sew along the edge with a 1/2" seam (as you can see in the photo below). Leave the top end of your stocking open (you don't want to sew the whole thing shut!). 
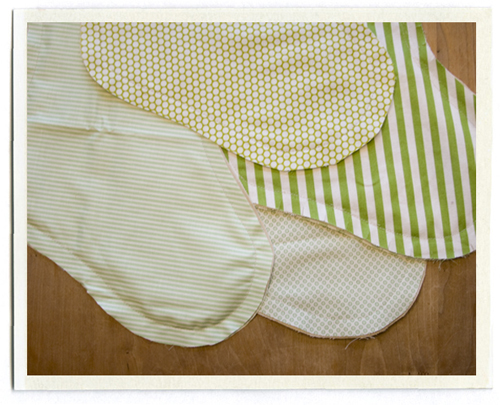
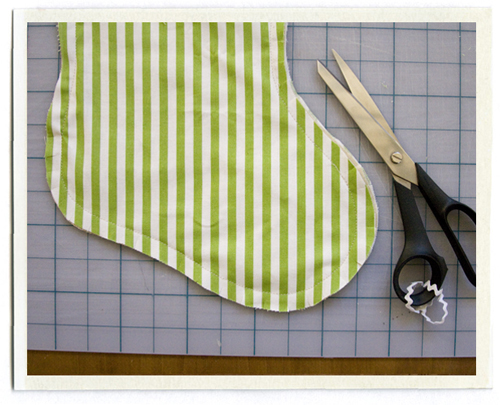
Step 12: Finish your seams as you like (mine just got pinked), but remember to clip around your curves a bit so you can turn things out easier. Turn your stocking out, so the lining is on the inside and the stocking fabric is on the outside, focusing on the shape of the toe and boot area (it helps to put your hand in the stocking and carefully push the seams out until you have a nice curved shape). Iron, iron, iron.
Step 13: Finish the top edge and add a loop. Make a little loop from some scrap fabric. (I used a piece about 2" wide and 4" long. Crease it lengthwise, fold the long sides in to meet the middle and fold lengthwise along the middle crease. Stitch along the long edge.) To finish the top edge of the stocking, fold it over 1/4" (it helps me to iron as I go to help "hold" the fold) and then fold again another 1/4". Iron so you have a nice tight fold and pin along the entire edge. Pin your loop in place so you can sew it in as you go around (I positioned mine in the back, a bit off the stockings side seam, to reduce bulk). Sew along the edge as carefully as you can, since this one really shows. Take your time when you get to the bulky parts and remember to backstitch at the start and end of your row. I went over my loop a few times, just to make sure it was secure. 
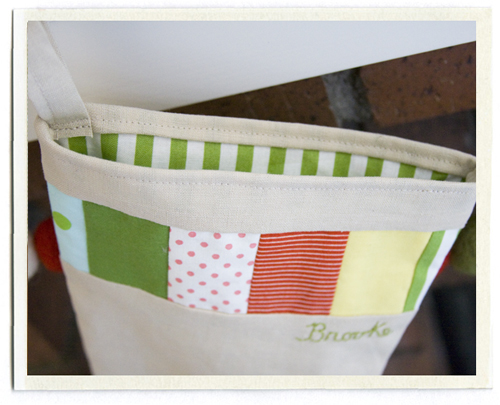
Hang from your mantle and wait for Santa! Good luck!

Monday
Dec292008

the stockings

Do you remember this little color story?

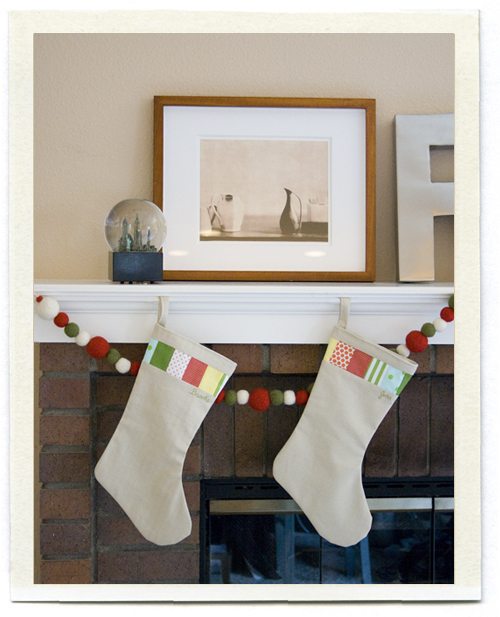
Here's what came of it: patchwork stockings for the whole family. I had high hopes of posting this before Christmas, but truth be told, they were only finished 2 days before. Next year they can hang from the mantle all month long. 

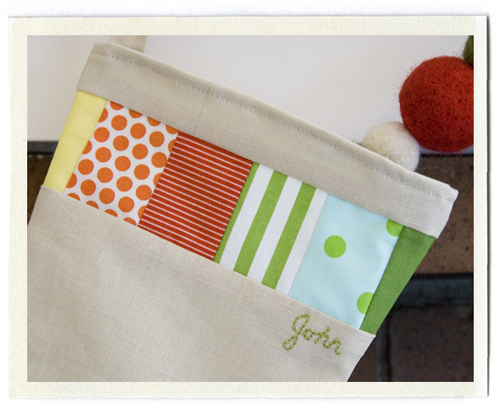
I made four stockings, two for John and I, and two for the kids. (Do people only make stockings for the kids? Well that's no fun.) I based the shape on a cheap stocking I bought last Christmas. Mine are made from a linen cotton blend I found at purlsoho, each has a different green lining and the person's name embroidered on the front. 

I did take a few how-to photos while I was putting these together, would you like to see them? Or is that just terribly boring? I'm always curious to see how things go together, but maybe you would rather just see the final product. Let me know. 

Sunday
Dec282008

a few of my favorite things

... decorating cookies ... time with cousins ... christmas sweaters ... our town's holiday parade ... chocolate sea salt caramels from trader joe's ... the christmas program at church ... my mom's spode dishes ... still wearing my flip flops ... carols sung round the piano ... ham with dad's applesauce ... santa balls ... hugs from grandma ... homemade cheesecake ... reading the nativity story ... hot cocoa with mini marshmallows ... late-night wrapping ... Bee singing jingle bells ... stockings, finally finished ... scalloped potatoes ... gingerbread men ... C worried about santa ... two excited children running into our bedroom at six in the morning yelling "He came! He came!"

Note: That is not me playing the piano, but my sister-in-law who has been teaching my nephew. They are playing a very sweet duet. Of course I have already signed C up for classes when he gets a little older. More on the stockings a little later.