Entries by Brooke (278)

Thursday
Mar252010

silo day 4

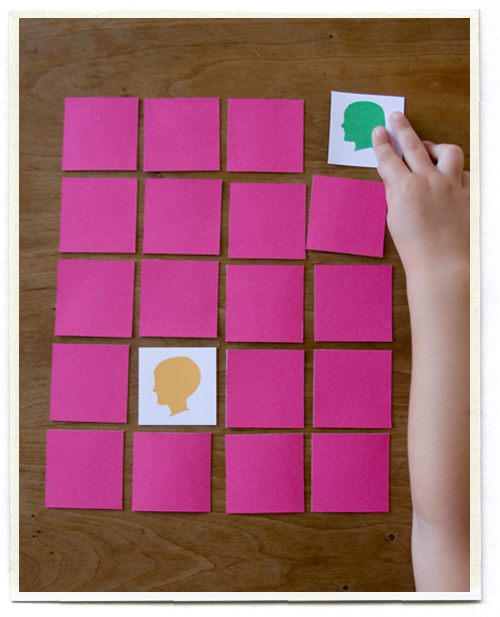
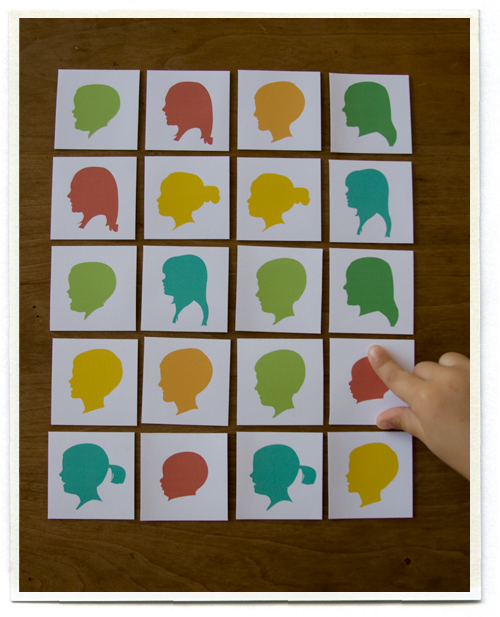
We're big fans of the game Memory around here (as you might remember), so I made a memory game with silhouettes for the kids to play. This version has 20 cards, and the silhouettes are of the kids and their cousins. I made my silhouettes different colors, so it's a little easier to see what matches with what. Print out your silhouettes on a nice cardstock, I backed mine with a piece of colored paper to make them a bit more durable. The kids have had fun guessing who is who, and I think a set of these for Grandma's house might be in order!

Wednesday
Mar242010

silo day 3

It's nice to see a whole family in silhouettes. I love seeing how dad's chin got passed on to little Johnny or how mom has the same profile as each of her daughters. We actually used silhouettes for our own holiday cards three years ago, which you can see above.

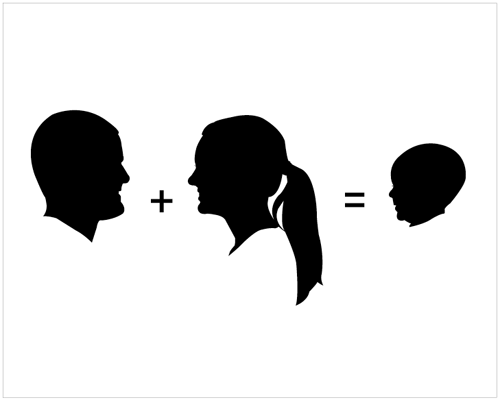
Last Christmas I made a card for a friend showing her family (the parents and their four children). I love how the personality of each child comes out in their silhouette. I was inspired by a piece of artwork which I saw in the article Martha Stewart Living ran about stylist Rebecca Robertson's home which shows mom + dad = child. (Rebecca was a stylist when I was an art director at Martha Stewart, and she is as lovely as she seems).

As a gift to my little sister for Christmas, I made a print of her little family and framed it in a simple black wooden frame. (I love these ones, and they are on sale right now!)

Tuesday
Mar232010

silo day 2

Silhouettes look great on t-shirts. I've done them in different colors, but for my boy, I prefer them in black. Make sure you use a 100% cotton t-shirt, without any ribbing or texture (I once made this mistake with a tank top and it made for a very messy silhouette). Once you have drawn your silhouette shape, these t-shirts are easy to make using a freezer paper transfer.

If you happen to be using Illustrator or another computer program, you can print your silhouette directly onto freezer paper if you have a standard inkjet printer. Cut your freezer paper down to 8.5x11, and feed into your printer just like you would any other paper (just make sure it's printing on the non-waxy side of the freezer paper). Then you just cut out the shape with an exacto knife, iron the waxy side onto your t-shirt, and paint with black fabric paint. I like to put another sheet of freezer paper inside the t-shirt in case the ink soaks through. For more detailed instructions, see here.

If you are drawing your silhouette on tracing paper, you can trace your paper cut out onto the freezer paper and proceed from there.

Monday
Mar222010

silo week

Thank you for all your sweet congratulations on our recent news. We used a family tree made of silhouettes to announce we were pregnant, so now that I have silhouettes drawn for everyone in my family, I've found they come in handy for lots of things. So I've decided this week should be "Silo Week" and each day I'll be sharing something new I've made with the silhouettes.

Today I'll share the valentines I made this year for my husband (above) and my kids (below is my son C). Draw or print the letter "I" (the font I used is American Typewriter) and a big red heart, and then add a silhouette.

Many of you have asked how I made my silhouettes, and I used Adobe Illustrator to draw mine. The first step is to take side profile shots of the people in your family. I did this when we were all gathered together last summer during a family reunion. A few tips:

-Pick a simple background, like a light colored wall, and have each person stand sideways, looking straight ahead. Babies can be held up (it helps to have someone they can stare at a few feet in front of them).

-Watch for shadows. I prefer shooting silos outside, in a shady spot so you don't get harsh shadows which make the shape of the head hard to see.

-Have girls put their hair up. Ponytails, pigtails, buns, etc. all make for a more interesting silhouette than long hair. Include as much of the texture of the hair as you see fit. (Sometimes I simplify the shape of a ponytail or a bun when I'm drawing it so it's a bit more polished.)

-Have your subject smile. You can see the expression more than you might think, and smiling silhouettes are better than sad, moping ones.

-Include the top of the shoulders. It's nice to see the shape of a collar, or the neckline of a t-shirt. I often use the neckline to draw a nice curving bottom to the silhouette rather than just cutting the neck off in a straight line.

-Add an eyelash where it's appropriate. Eyelashes usually do not naturally extend beyond someone's nose so technically you shouldn't see them in a silhouette, but I think it's nice to see where the eye falls and it helps to add in a little eyelash.

Here is the side shot I did of my nephew, and the resulting silo.

I realize that not everyone has access to Illustrator or other vector based drawing programs. Here's a good tutorial from the talented folks at Three Potato Four where you trace a photo using tracing paper and then cut your silhouette out of paper.

Stay tuned this week for a new silhouette posting each day!
Monday
Mar082010

hello wedding

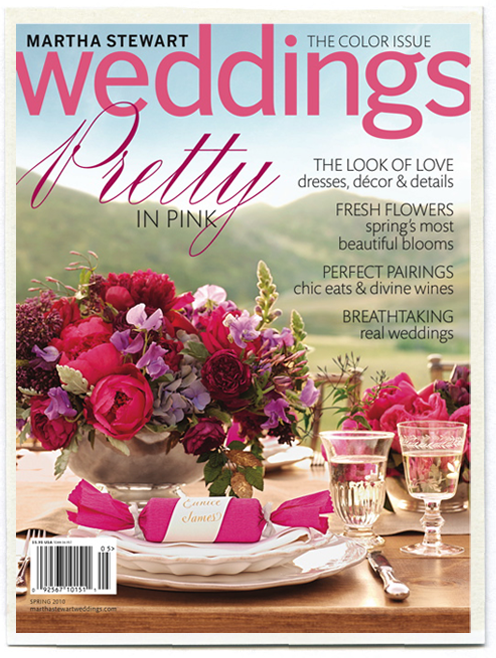
Last year I mentioned going on a photo shoot for a lovely wedding in Northern California. Nine months later, it is finally featured in the Spring 2010 issue of Martha Stewart Weddings. I was pleasantly suprised to see that it also landed on the cover!

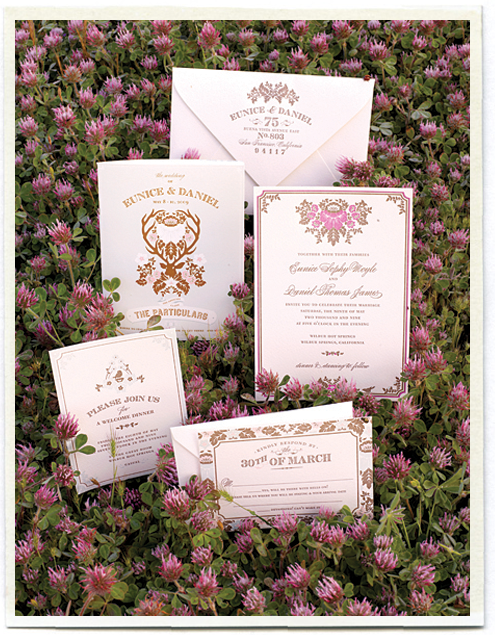
The wedding was for Hello! Lucky stationery creative director Eunice Moyle, and it was ridiculously beautiful and a bit quirky and seriously fun. One of my favorite elements was the stationery, from the invitations themselves to the labels on the jelly jar favors, every piece was beautiful... and that pepper jelly, amazingly good on biscuits. Eunice also designed a set of playing cards with the motifs from the wedding, such a nice keepsake for each of the lucky guests. You can see more of the stationery suite here. (We had to wake up at 5 AM in order to get this shot of the stationery in the clover before the sun came up over the mountain... but I think it was worth it.)

Eunice and her sister Sabrina were so calm, great examples of grace under pressure. And I loved meeting their sweet father, who I chatted with between shots. He told me how he always read to the girls every night when they were little. "And not kid books either.. real books like Treasure Island." It was after speaking to him that I started reading more chapter books to my kids each night, instead of only picture books. Great advice!

Congrats to Eunice and Daniel..

Wednesday
Mar032010

our news

I mentioned we had some news that we shared with our friends in our new years card (and a special thank you to our patient friends and family who actually sat down and de-coded the card!). We wanted to share our big news with my parents and our children Bee and C on Christmas morning, so we decided to tell everyone all at once.

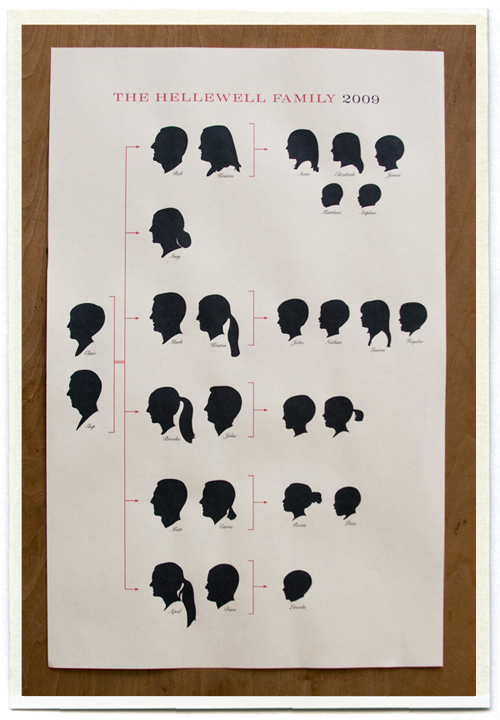
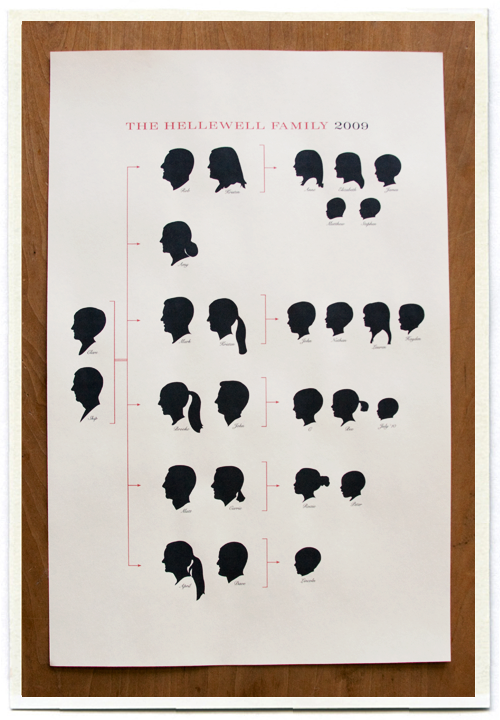
I offered to help my parents with their Christmas card this year and decided to do a Family Tree showing how our family is growing (there were 3 new babies in 2009). My parents have six children (I'm the fourth) and between my siblings and I there are 14 grandchildren. While I had everyone together this summer for our annual family reunion, I asked each person to stand against a wall so I could take their photo (mug shot style, with a sideways profile..).  Later I traced the photos in Illustrator to make silhouettes of each person in our family. The result was a family tree chart that we printed on 10x14 sheets of paper and folded in fours and mailed out as Christmas cards.

For a gift to my parents I printed a large poster size version, framed it in a simple black frame, and wrapped it up for them to open Christmas morning. My mom unwrapped the gift with Bee and C sitting next to her. Immediately Bee and C wanted to know where they were in the chart, so my mom pointed to their silhouettes. And that's when she realized that this chart had a new addition (fourth row).

A new little baby for our family. It was perfect. My mom screamed, and the children literally jumped for joy (they've been asking for a baby for over a year now). It might be the happiest Christmas morning ever.

Sunday
Feb282010

how a logo is made

The past few weeks I've been working on a redesign for one of my very favorite clients, the lovely girls over at Purl Soho. If you haven't heard, they are moving their two sweet knitting and sewing shops in New York City into one HUGE store over on Broome Street.

Now that the two stores (Purl and Purl Patchwork) are combining, they needed a new name and a new logo. The new store will be known as Purl Soho.. and there is a great post up on the Purl Bee explaining how the new logo came to be. I had to break out my trusty tracing paper for this one (sketches can be seen above). It reminded me that though most of my design work is now done on the computer, sometimes you need to take a break from the keyboard and pull out your pencil and just draw.. and draw.. and draw.

Friday
Feb192010

a party for bee

I had such lovely dreams for Bee's fourth birthday party. A flower theme, out in the backyard. Children running around the backyard on a scavenger hunt to find various flowers in the garden, potato stamping flowers onto goodie bags, planting their own flowers to take home in little pots, a flower pinata, etc. And then it rained. Again. (Remember C's party this summer?) So we moved the party inside. Again.

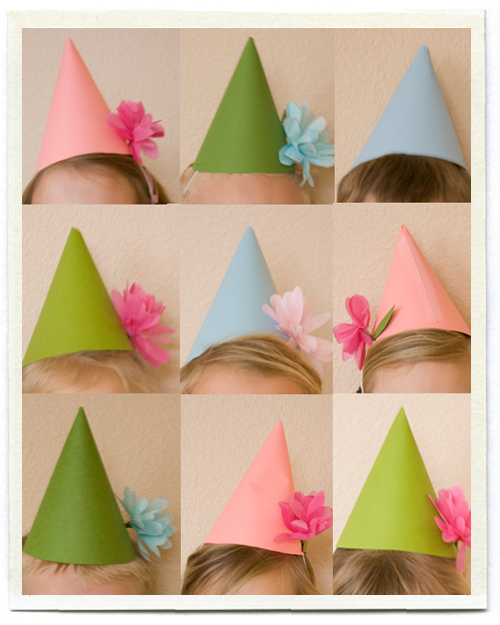
At least the kids had cute hats to wear. I made these out of paper I had around, and then fashioned a few more tissue flowers to staple to the side. (I'm pretty fast at making those now!) The kids looked awfully cute in their party hats.

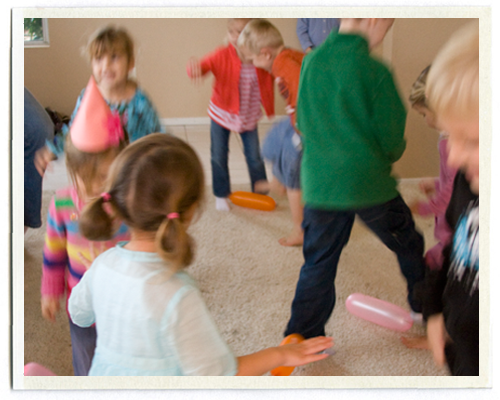
And we somehow came up with enough games to entertain them. Do you remember that great party game where you tie a balloon onto everyone's ankle and then you try to stomp on everyone else's balloon? I remember it being great fun.. the three and four year olds felt otherwise. Bee was the first to cry when her balloon got popped.

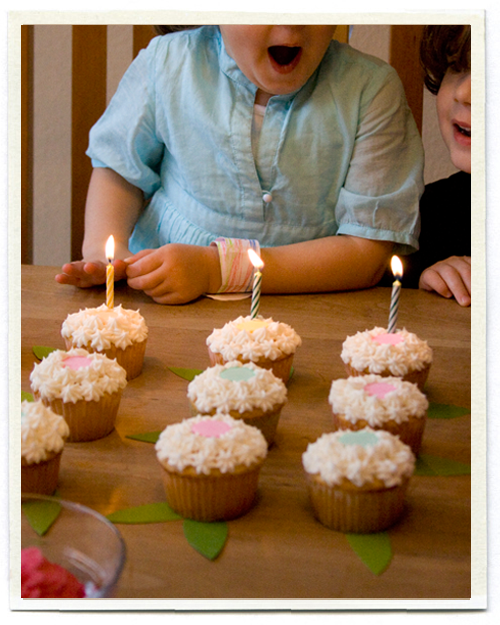
But they all perked up for cake. Bee wanted cupcakes this year, with flowers on them. We piped frosting into little petals and laid a Necco wafer in the middle. I cut out a few leaves for them to sit on.

And then the pinata. I hoped to find a pretty flower pinata at the party store, but there were none. So we bought a soccer ball pinata that was white with bits of black tissue on top. We pulled off the black tissue and then covered the entire thing with rows of tissue paper petals. (Special thanks to JR who did most of the work.)

Here it is almost finished. We were hoping it would look like the camellias that have just bloomed in the front yard. I think we came pretty close. We were a little sad to have the kids bash it into a million pieces.

And so, our little one is four! We can hardly believe it. We love her so. Happy birthday sweet Bee.. I'll be praying for sunshine for your next birthday party!

Wednesday
Feb172010

bee turns four!

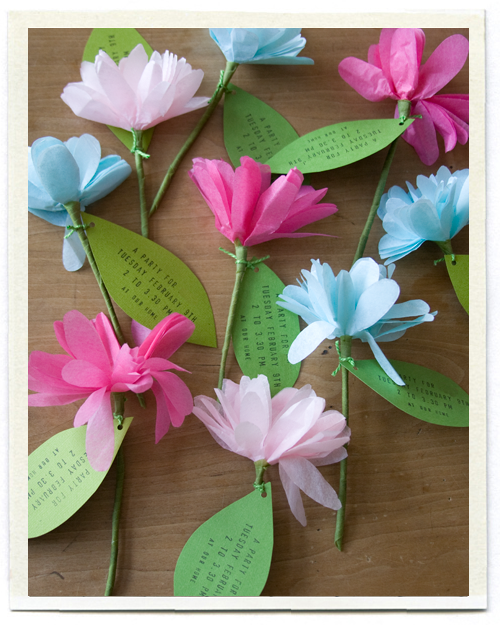
Our little girl turned four a few weeks ago and we wanted to throw a party to celebrate! Bee decided all on her own that she wanted a "flower party", and I quickly remembered this story we did at Martha Stewart Kids about making flowers out of tissue.

Pretty soon we had enough flowers to deliver to Bee's little playgroup and preschool friends, with a paper leaf that told them everything they needed to know. Instead of mailing these, I like going door to door with the kids and having them deliver their invitations themselves. Bee had a lot of fun running around with her paper bouquet.

Party details to follow.

Monday
Feb152010

honest abe

I hope you're enjoying a lovely President's Day weekend. Bee brought this log cabin home from preschool last week and proceeded to dazzle us with her knowledge of Abraham Lincoln. Not bad for a four year old...

"This is Abraham Lincoln's house. He wears a big black hat and he's really really tall. He was very poor when he was little, so he lived in a house made of pretzels. Then he died. But he never ever told a lie, so they put his picture on the penny."

Awesome.