Entries in birthdays (8)

Tuesday
Nov082011

dad turns seventy

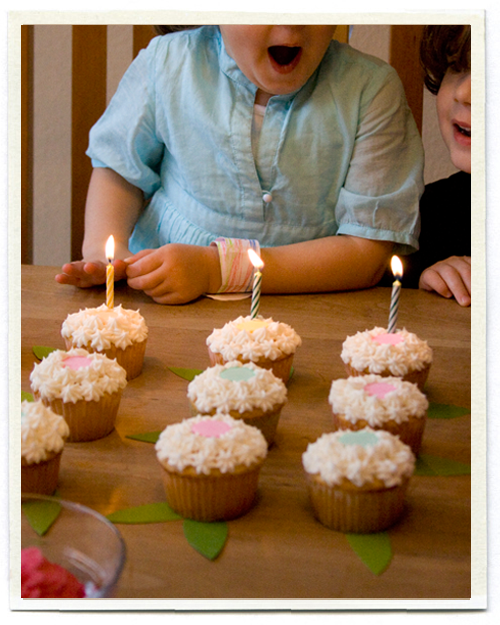
My dad recently turned seventy (!) and my mom and I wanted to do something special for him. Dad didn't want a big party, and he and my mom were going to be out of town on his actual birthday, so we decided to give him a gift that would continue all month long.

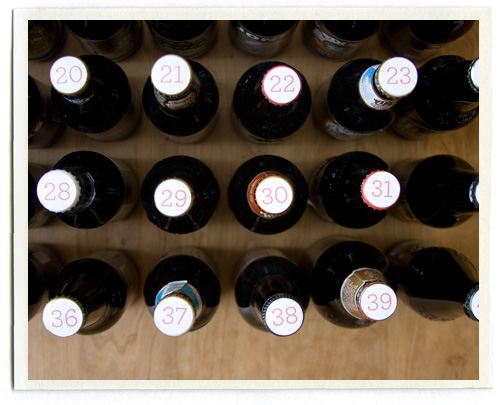
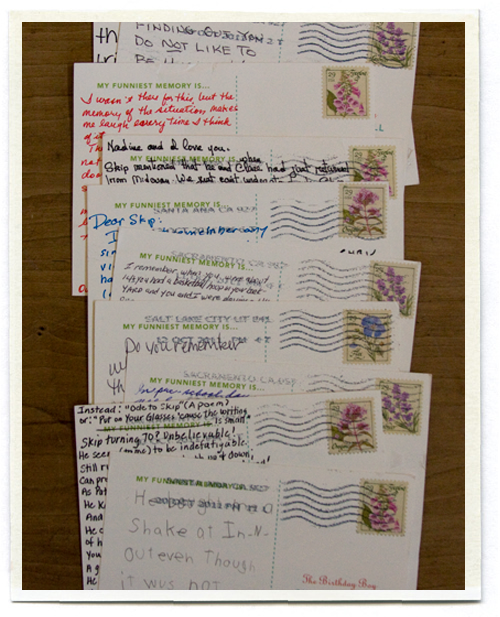
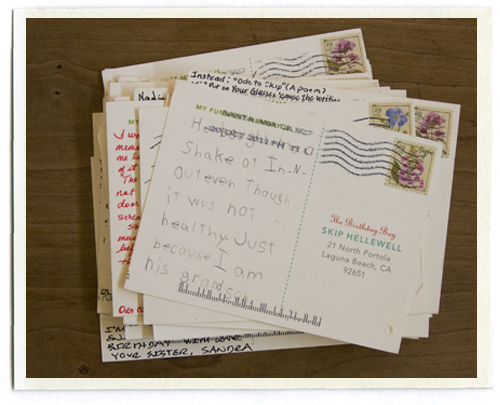
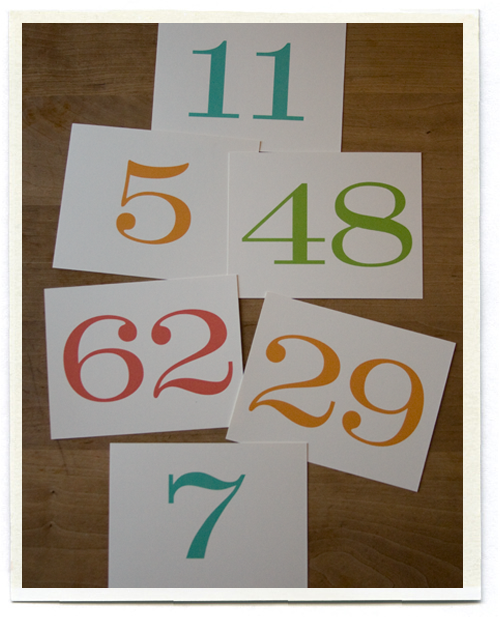
I printed 70 postcards on thick cardstock (110 lb.), each with a different number between 1 and 70. My mom helped gather addresses for seventy of the important people in my dad's life: family members, old classmates, dear friends and all his grandchildren. Included in the envelope was a card explaining that it was dad's birthday, and that they needed to send the postcard back sharing their funniest memory of Skip. To make things easy, I pre-addressed and pre-stamped the postcards so all they had to do was write a quick note on the back and toss the card in the mail.

When my dad got home a few days after his birthday, there were a handful of cards in his mailbox. He was surprised and delighted. And then the next day there were a few more cards, and the day after that, a few more. This continued on for the rest of the month until he had quite a stack. I hadn't asked people to stagger when they mailed their cards, that just happened naturally. Some of the notes were heartfelt and quite moving, others were funny, bringing up memories my dad hadn't thought about in years. I especially loved reading what his grandchildren wrote. All in all, a pretty inexpensive gift (postage was our main expense) and one I think my dad will remember for quite some time.

Friday
Aug122011

bottle cap labels

JR celebrated a big birthday a few weeks ago, and he's notoriously hard to buy gifts for. The kids and I thought long and hard about what to get him and decided to give him a collection of different gourmet root beers. JR really likes a good root beer (his favorite right now is Virgil's). Because JR was turning 40, we collected 40 different kinds and added a numbered label to the top of each bottle cap.

We printed the numbers out on label paper (I use the Avery full page sheets that you feed into an inkjet printer) and then punched them out with a 1" circle punch. Luckily all bottle caps seem to be right around 1" wide. While we were getting the bottles ready my five year old Bee remarked, "This is going to be a lot of work when dad turns 100!".

Letters could work too, you could spell out a message or just say "Happy Birthday". If you'd like to make some of your own bottle cap labels, I've made a two page file you can download here. Numbers are on the first page (up to 50) and letters on the second page (which includes two of almost all the letters in the alphabet). Happy Birthday JR! You're going to let me help you drink some of that root beer, right?

Saturday
Feb122011

bee turns five

Bee had several ideas for her birthday party this year, but we decided on a pink pajama party. Bee's birthday is a little before Valentine's day, so hearts were the perfect motif. Invites were simple cards with a sewn on heart slipped into envelopes we made following this tutorial. Bee personally delivered them to all her friends (these envelopes are awfully cute, but I wouldn't try to mail them!).

We blew up a ton of balloons to throw around the house, which is much easier if your husband takes over and blows them up with his air compressor. I usually get a dozen or so helium balloons for a party, but you can about 5 dozen unfilled balloons for the same price, and when it comes to balloons... I say the more, the merrier.

Our party started at 9 AM, and we asked the kids to come in their pajamas (and bring their pillows with them). The kids seemed to get a kick out of showing up in their pjs, and they looked awfully cute all together. Bee requested a number shirt like I always make C for his birthday, so I freezer paper stenciled a 5 in a heart. One benefit of an early party is that it forces you to have everything ready the night before, there's no time to rush around and finish things in the morning, which is great if you are a procrastinator like myself. 

When the kids first arrived we sat at the table and made valentine's... kind of like a kid version of Martha's crafternoon. We had punches and crayons and paper and stickers and the kids did a great job all on their own (I thought it was sweet that most of the kids chose to make cards for their moms).

We spread blankets out and had the kids lie down on their pillows while we read a few of Bee's favorite picture books... JR makes a very convincing pigeon.

During the stories, I took one girl at a time and painted their nails. Bee is a nail biter and I have NEVER let her paint her nails... I said that would be her reward if she could stop biting her nails. A few weeks before the party she showed me her hand so I could see that she had stopped, and much to Bee's delight, we got to paint fingernails at the party!

We used some old pillowcases for sack races in the backyard. We did several heats since the kids were much faster than I thought! We also played "musical pillows", which is just like musical chairs except you jump on a pillow when the music stops.

One game that we made up on the spot was the pillow long jump, seeing how far each child could jump in one jump.. and if they fall, they land on a bunch of pillows! We also played pin the heart on Bee (instead of pin the tail on the donkey).

We kept the food simple: little pink pancakes with strawberry jam and whipped cream, fruit skewers, and orange juice. (It gets busy trying to serve nine five year olds pancakes all at the same time, so forgive me for not having a photo!) I think pancakes are the perfect kid party food.. they all love pancakes and it's nice to be able to make one thing instead of sandwiches where I feel I need to make three varieties to make everyone happy.

We had blueberry muffins for "dessert" so Bee could blow her candles out, it just seemed a little early to be giving kids cake! All in all, a really fun party.. and one of the easier parties we've done in terms of planning. Happy birthday little Bee..

Saturday
Aug282010

a balloon pinata - the how to

We needed lots of candy in our balloons for our balloon pinata. Our first attempts, just opening the neck of a standard latex balloon and shoving in as much candy as we could, averaged about 3 to 4 pieces before we poked a hole somewhere. My husband then decided it was time for a new plan and a trip to Home Depot.

The basic concept is to create a vacuum so you can expand the balloon, insert your candy, and then slowly deflate the balloon. This was the method my husband came up with, but you could make a vacuum any number of ways. You'll need a wet/dry vacuum, and a few other items: a 4" PVC pipe elbow, a 4" rubber end cap, a piece of PVC coupling that's big enough for your candy to pass through, a 4" to 2" reducer, and a little valve to help control the airflow. (All this will run you about $20, assuming you have a vacuum.)

You can see everything in the photo above. Starting from the left side: the valve (attached to the wet/dry vac), some PVC pipe, a 4" to 2" reducer (the black funnel-like piece), and a 4" elbow piece of PVC pipe.

You need to cut a hole in the rubber end cap (the black piece on the bottom right) to fit your 2" PVC coupling. This is what you will feed your candy through.

Once you're all assembled, stretch the neck of the balloon over the 2" pipe coupling. Then slide the rubber end cap onto the elbow piece, with the balloon inside the elbow.

Now the tricky part: You need to open up the valve just enough to create a vacuum and expand your balloon. It's all about pressure, you need a decent amount of pressure to expand the balloon, but if you use too much, it will pop. 

It's probably not a perfect seal, so you need to maintain the vacuum with a certain amount of pressure to keep the balloon blown up. JR found it helped to manually tweak the pressure by holding the joint between the valve and the wet/dry vac hose (see photo below).

Once your balloon is expanded, grab your candy and drop it piece by piece through the 2" piece of coupling (we made ours big enough to fit our biggest piece of candy, a box of Nerds). We found 13-15 pieces of candy worked well, when we tried to do more we usually popped our balloon. Then slowly tweak the pressure so the balloon deflates around the candy.

When you open up the rubber end cap, you'll see all the candy with the balloon deflated around it. We then used a small hand pump to blow up the balloons to the desired size. 

We blew our balloons up the night before the party and kept them in a large trash bag. Once we were at the park ready for the party, we staple gunned the balloons to a big wooden board (we covered ours with a plastic tablecloth to avoid splinters).

One at a time, each guest at the party stood about 5 feet in front of the board and threw a dart at the balloons, trying to pop one. The balloon would pop, and the candy would explode, and the child got to run and grab all the candy from their balloon. The kids loved it, and even the littlest guys who were 4 and 5 years old could pop a balloon pretty easily. 

Thanks for figuring this one out JR. I love the crazy way your mind works.

Friday
Aug272010

a balloon party

C's 6th birthday was a celebration of all things balloon related: helium filled balloons, giant balloons, rocket balloons, punch balloons, water balloons, etc. We held the party at a nearby park and invited a dozen of C's school friends and cousins. C and I drew up a plan for his birthday with ideas for games, favors, the cake, etc.

The part we were most excited about was the Balloon Obstacle Course, which was based on an obstacle course we did back at Martha Stewart Kids. We held the party at a local park since the obstacle course needed a decent amount of space. (Lesson #1: Parties not held at home require a lot more work! Don't underestimate the time involved in just hauling things from one place to another!)

The obstacle course started by crawling underneath two tables (we also used them to hold the gifts). Then the kids ran over a balance beam we made from some 2x4s. Next was the wagon pull, where they pulled the wagon around some balloons. Then they held a balloon between their legs and hopped to the next station where it ended with a bucket of water balloons. You had to grab a balloon from the bucket and toss it into another bucket a few feet away.

(Lesson #2: Sometimes things aren't quite as fun as you think they will be!) The kids were excited about the obstacle course, and they cheered the first 3 or 4 people on with lots of enthusiasm. One child could run the course in about two minutes, but when you have twelve children at a party (plus more siblings who wanted to try the course as well) the kids who had already gone seemed a little bored of it by the time we were done. I think next time I would figure out some way to involve the kids more in the course itself so they aren't just sitting watching.. make one child your timer, another in charge of yelling GO!, have one hand out the water balloons, etc.

We kept the food simple: PB+J for the kids, turkey and basil sandwiches for the adults, watermelon, grapes, pretzels, veggies + dip, and lots of juice boxes. For the cake, I blew up little balloons (like the kind you use for water balloons) and tied them to skewers. It made for a festive centerpiece and the balloons were easy to do the day before. (Lesson #3: Cake is a lot more work than cupcakes. It requires a knife, and plates, and forks, etc. I vote cupcakes next time.)

Favor bags were stenciled with a red 6 and held a few dot candies and a punch balloon. The kids used their bags to catch the candy from the "balloon pinata".

The balloon pinata was my favorite part of the party. I love pinatas, and my children always insist on having one at their parties... but the pinatas never seem to work the way I want them to. The kids usually can't get the thing busted open and one of the adults has to step in and finish the job. The pinata just kind of falls to the ground and we have to pick it up and shake the candy out. And then of course, the pushing and shoving as the kids try to grab as much candy as they can.

Here's what we did instead: you know that carnival game where you throw darts at balloons? We filled balloons with candy and hung one balloon for each child on a wooden board (we covered ours with a plastic tablecloth so a splinter wouldn't accidentally pop the balloons). Each kid had a chance to throw a dart (or two or three) at the balloons until one popped and then they got to run up and grab all the candy from their balloon. The kids loved it and we avoided that moment where one child is crying because he didn't get enough candy (which always seems to happen when we have a pinata).

Note: There's a trick to filling up the balloons with candy. If you try to just shove a few pieces into a balloon before you fill it, you'll be able to fit about 3 pieces before you poke a hole somewhere. We wanted a big explosion of candy, and 3 pieces wasn't going to cut it. My husband, who is an engineer at heart, figured out a great way to fill the balloons up with about 15 pieces of candy. And yes, it involved a trip to Home Depot and a Wet Vac. Details to come.

Thursday
Aug262010

a balloon party - the invites

C turned 6! We had a lot of fun planning this balloon themed party, I love that he is old enough now to really get involved in the planning process. Rather than throwing invites in the mail, I love delivering the invitations in person a few weeks before the party. All the kids we were inviting live close by, and my kids have a lot of fun running around to all their friend's houses. (It also helps me limit how many kids to invite!)

We rolled the invitations into a little tube and then slipped them into a helium filled balloon, along with a few pieces of confetti. It might not surprise you that I worked at a party store when I was a teenager and I can remember filling balloons with confetti or rolled up dollar bills. The trick is to roll up the invitation as small as possible, secure it with a little tape, and then stuff the invite and the confetti into the balloon before it gets filled with helium. Then attach a little sign that reads "Pop me!" to the balloon string.

We used clear balloons so you could see the invite and confetti clearly. C's friends were so happy to see him on their doorstep, balloon in hand. And really, what's more fun than getting to pop a balloon!

More scenes from C's party tomorrow!

Sunday
Aug152010

39 reasons why I love you

I love my husband. And he knows that. But on his birthday, I like to make sure he knows it in more ways than one. So this year I sat down and wrote out 39 things I love about JR, since he turned 39 this year. (I take it as a good sign that 39 things came fairly easily.. maybe it will get more difficult when he is turning 87?)

Here's how to make your own...  Grab some strips of paper, some colored tape, and some string. Then write 39 things you love about the birthday boy: traits you admire, things you know will make him laugh, add some serious things as well. Lay out some string and tape your strips in order, from number 1 to 39 (mine were about 18 inches apart).

Hang your string up using a little more tape. I put mine up all around our living and dining room, since it's the first room my husband enters when he comes home. They make a festive little garland, and later that night JR walked slowly around the room reading all of the messages.

When I took the garland down a few days later I saved all of the little strips, tucked them into an envelope and stashed it in my husband's desk so he can reread the things I love about him anytime he likes.

And because so many of you asked.. I got my tape as a Christmas gift from here.

Friday
Feb192010

a party for bee

I had such lovely dreams for Bee's fourth birthday party. A flower theme, out in the backyard. Children running around the backyard on a scavenger hunt to find various flowers in the garden, potato stamping flowers onto goodie bags, planting their own flowers to take home in little pots, a flower pinata, etc. And then it rained. Again. (Remember C's party this summer?) So we moved the party inside. Again.

At least the kids had cute hats to wear. I made these out of paper I had around, and then fashioned a few more tissue flowers to staple to the side. (I'm pretty fast at making those now!) The kids looked awfully cute in their party hats.

And we somehow came up with enough games to entertain them. Do you remember that great party game where you tie a balloon onto everyone's ankle and then you try to stomp on everyone else's balloon? I remember it being great fun.. the three and four year olds felt otherwise. Bee was the first to cry when her balloon got popped.

But they all perked up for cake. Bee wanted cupcakes this year, with flowers on them. We piped frosting into little petals and laid a Necco wafer in the middle. I cut out a few leaves for them to sit on.

And then the pinata. I hoped to find a pretty flower pinata at the party store, but there were none. So we bought a soccer ball pinata that was white with bits of black tissue on top. We pulled off the black tissue and then covered the entire thing with rows of tissue paper petals. (Special thanks to JR who did most of the work.)

Here it is almost finished. We were hoping it would look like the camellias that have just bloomed in the front yard. I think we came pretty close. We were a little sad to have the kids bash it into a million pieces.

And so, our little one is four! We can hardly believe it. We love her so. Happy birthday sweet Bee.. I'll be praying for sunshine for your next birthday party!