Thursday
Mar142013

this week's library book

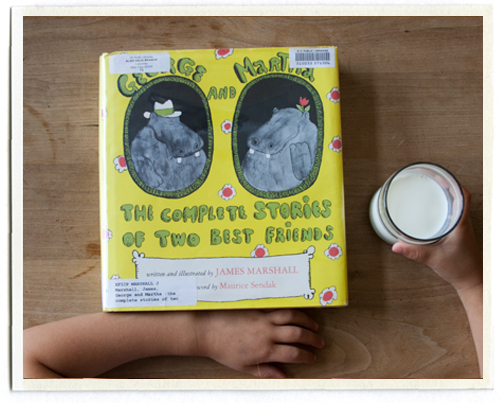
This week's library book was a favorite of mine as a child, George and Martha by James Marshall. There are several George and Martha books, each consisting of four or five short stories about the adventures of two best friends. This book is a compilation of all the George and Martha books, over 300 pages of their adventures.

In the foreword, James' friend Maurice Sendak explains, "If one of James's most remarkable attributes was his genius for friendship, then George and Martha are the quintessential expression of that genius. Those dear, ditzy, down-to-earth hippos bring serious pleasure to everybody, not only to children. They are time-capsule hippos who will always remind us of a paradise in publishing and—both seriously and comically—of the true, durable meaning of friendship under the best and worst conditions." 

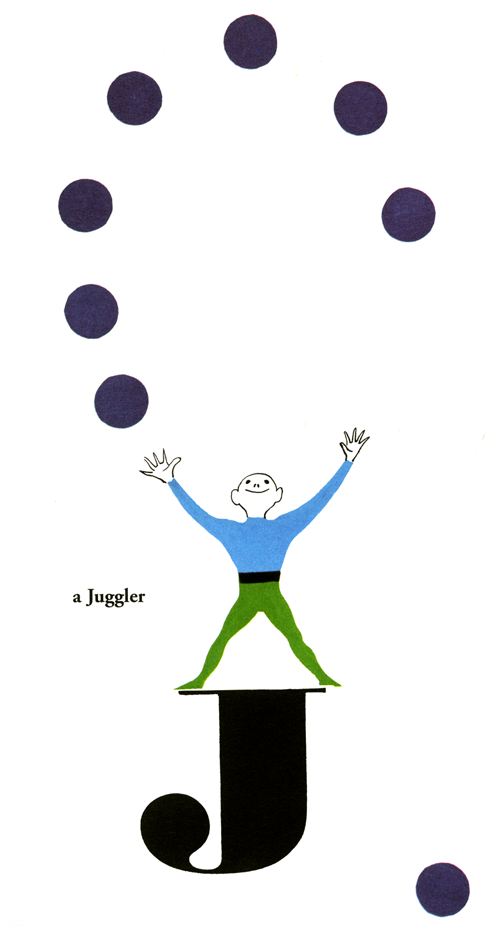
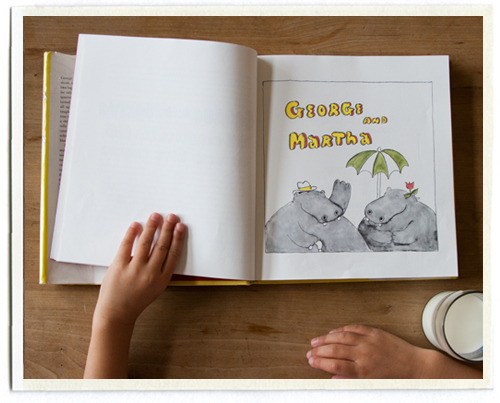
I have always loved James Marshall's illustrations. I especially love the hand drawn type which introduces each story. I spent hours as a child trying to replicate his bubbly letters. As Sendak says in the foreword, "Much has been written concerning the sheer deliciousness of Marshall's simple, elegant style. The simplicity is deceiving; there is richness of design and mastery of composition on every page. Not surprising, since James was a notorious perfectionist and endlessly redrew those "simple" pictures." 

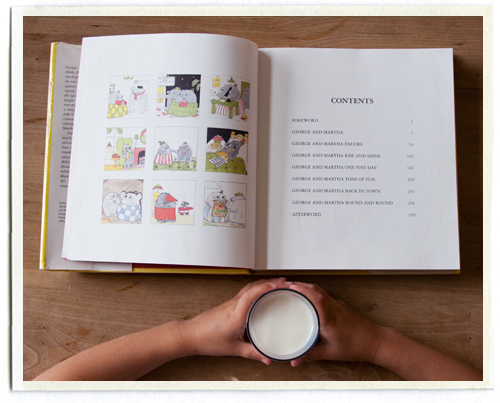
I read that most of the George and Martha books were printed as four color overlays, so Marshall had to make four different drawings, one for each color. For a 48 page book, this meant he had to create almost 200 pieces of art. He sometimes had a hard time meeting his deadlines. As his publisher writes in the afterword, "He was a great storyteller personally as well. His grandmother died three times, according to Jim, to explain overdue artwork."

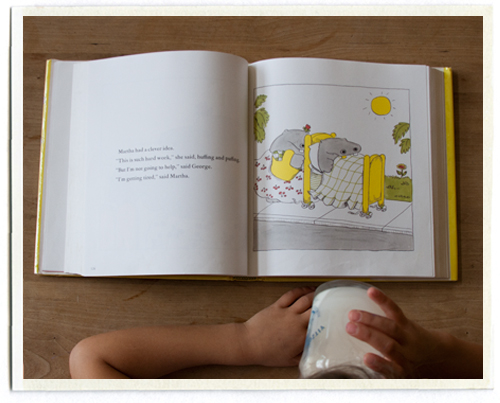
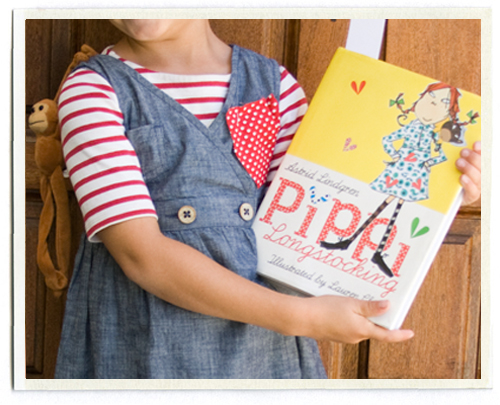
I was putting together a board on Pinterest of all the library books I've shared over the years, and realized how much I love seeing our books this way. Documenting our favorites has gotten a little harder now that my daughter Bee (my most patient hand model) is in school all day, but I love doing it. Some of our favorite books have been checked out from the library several times and feel almost like old friends.

Thursday
Feb142013

fabric hearts

Is it really Valentine's Day already?! I had high hopes of showing these earlier in the month so you would actually have time to use them, but I'm afraid the 14th snuck up on me! After making the fabric heart bookmarks, I had a few other ideas for our fabric hearts. (If you're going to purchase a heart punch, you might as well figure out ways to use it.) I made some fabric heart tags, using the same method as the bookmarks. You can download the template here, which prints five to a page. 

My kids always want to give boxes of sweethearts to their classmates, but I like to upgrade the packaging. These bands fit perfectly around a box of sweethearts (currently 3 for $1 at my grocery store). And because the back of the heart isn't shown, there's no need to back the paper like you would in a tag or bookmark (see my directions here). After printing the template onto cardstock, you just tape the fabric square behind the heart cutout and wrap the band around the box. You can download the template here (it prints three bands to a page). The red dashed lines can be scored for easier folding.

Happy Valentine's Day! May you be surrounded by the ones you love!

Wednesday
Feb062013

valentine bookmarks

We just received the dreaded email from Bee's teacher: "Please no candy or edible treats with valentines this year." WHAT? What's a valentine without some candy, especially to a group of 6 and 7 year olds? So we scrambled to think of something the kids will actually use (rather than buying cheap plastic party favors or going the uninspired sticker or pencil route).

Remembering these escort cards and holiday tags, we rounded up some red and white fabric and started making valentine bookmarks. To get started you'll need: white cardstock, an x-acto knife and ruler, a bone folder, a cutting mat, a 1.5" heart craft punch, a glue stick and some fabric scraps (cut to roughly 2" x 2").

First you'll need to print out the template on white or cream cardstock. I use an x-acto knife and a metal ruler, being careful not to cut all the way through the ends of the paper so my template stays together while I am cutting. It also helps to run a bone folder over the line where the bookmark folds (marked with a red dashed line on your template). This will help the card fold smoothly, so you won't have a jagged edge.

Use your heart punch to punch out the heart on the bookmark. If you don't have the right sized punch, you can try cutting the heart with a sharp x-acto knife.

Glue the fabric scrap to the inside of the bookmark, placing it so it will show through the cutout heart when the bookmark is folded. Then apply glue to the entire left side of the bookmark (the side with the heart cutout) especially along the edges and around the heart. Fold your bookmark carefully in half.

Use a bone folder to smooth out the glue and make sure every part of the heart is thoroughly glued down. Pay special attention to the edges. You can use all kinds of fabric, but since such a small amount of fabric shows through the heart, those with a small repeat work best.

For a nice finishing touch, round the edges of the bookmarks with a corner rounder.

I've got a few other ideas up my sleeve for these fabric hearts.. Stay tuned!

Saturday
Jan262013

10!

A few months back JR and I celebrated our tenth wedding anniversary (10!). Inspired by a card I saw in Martha Stewart Living last February which had several envelopes glued together to make one long card, I made a folded card for JR with an envelope for each year we've been married. 

Inside each envelope was a card that shared my favorite memory from that year, and a photo that went with the memory. (In 2010, it was the birth of our little girl Em, so the picture was of our older two children holding baby Em on the day she came home from the hospital).

The front flap of each envelope was taped to the back of the year in front of it (for example, the flap of 2010 was taped to the back of 2009). I taped the sides of the flap and also the bottom of the flap as seen above. Note that you need to use sticky tape so that the card holds together, I used washi tape in my first attempt and it fell apart when I folded my card up. You can also glue the flap instead if you don't want to see any tape between the envelopes.

Then fold up your card accordian style, tie with a string, and add a little tag. Perhaps my favorite part of making this card was going back through all our old photos and finding a picture for each year. Watching our little family grow from a young married couple, to working newlyweds, to parents of one tiny baby... then two, then three, and now four beautiful kids. It's a little like seeing your life on fast forward and reminded me how happy I am to spend my time with these special people.

Here is a template you can use for the cards. Cards print 4 to a page and fit in size A2 envelopes (I like the ones from Paper Source because they come in such lovely colors). I only went back to 1991, since due to the work involved, this card is probably best for couples who have been together less than 20 years! 

I think this same idea could also make a thoughtful, non-cheesy Valentine's Day card. Maybe I should make a red or heart version?

Tuesday
Jan152013

valentines past

Now that Christmas is over, I know you're losing sleep fretting about what to do for valentines this year. I find it hard to think of something the kids can actually help make, that doesn't take oodles of time (we've got 30+ kids in a class here!), and won't cost me an arm and a leg. I'm here to help with a collection of my favorite valentines I've made with my kids in years past.


For your son who wouldn't be caught dead passing out anything pink: STAR WARS VALENTINES 


For your daughter whose teacher has outlawed candy or anything delicious: I'M A FAN VALENTINES


For your son who thinks two pieces of candy are better than one: MR. HEART VALENTINES


For your daughter who wants to write a few special notes to her nearest and dearest: HEART CLOSURE VALENTINES


For your son who wants to make something special for each kid in his class: PORTRAIT VALENTINES


For your daughter who prefers notebooks to candy: PERSONALIZED NOTEPAD VALENTINES


And last, but not least, the ever popular: MATCHBOX VALENTINES

 Happy valentine crafting! We're off to create something new for 2013..

Monday
Nov262012

crafty chloe giveaway

As part of our Christmas gifts each year we always give a new book to each child, so I'm always on the lookout for books that are worthy of living on our shelves (and not just borrowed from the library once or twice). I was excited for Crafty Chloe to come out months before it actually did.

Part of the reason is that I was having lunch with Heather Ross (who illustrated the book) while visiting in New York when she was right in the middle of picking a publisher and finalizing details. I was so excited for a book that encourages crafting and making things and teaches young girls that the best gifts are handmade. Nothing against Fancy Nancy, but it's nice to have a heroine who knows her way around a glue gun.

This is the story of Chloe, a girl not so good at other things (like dancing or sports or video games), but VERY good at making things. When she gets invited to a friend's birthday party, she decides to make her present. There is, of course, a snotty girl named London who can't believe Chloe would make a present instead of buying one. 

But after London's gift is ruined, Chloe saves the day with her handmade creation. As a clever tie in, there is also a Crafty Chloe blog with ideas for crafting projects from the book. And they have already announced a second book titled Dress Up Mess Up, coming out next year.

Heather graciously gave me one extra copy of Crafty Chloe to give away! Please leave a comment explaining why you like crafting with your kids and a winner will be picked later this week. (Deadline to enter: Friday November 30th at 10 PM. US residents only please!) 

The randomly chosen winner is Christy, who left the comment, "Crafting with my daughter is something I dreamed of before having kiddos. It is everything I dreamed it would be and more! Your daughter might like the book Fanny by Hollie Hobby- similar message and so sweet.

Tuesday
Oct162012

literature day

I can vividly remember back when I was in kindergarten, walking through the classrooms of my elementary school dressed in my Halloween costume. Halloween was pretty much the highlight of my life at the age of 5, and I remember snaking around the desks as we moved from one classroom to the next, with the older kids clapping.

I had no idea until I had kids of my own, that many schools don't allow costumes on Halloween anymore. At the school we used to attend, Halloween was just a regular day at school. No costumes, no parties, no special treats or games. 

Last year we switched to a new charter school in our area, and they have a great way of celebrating Halloween. They call it "Literature Day" and they have the kids dress up as a character from a book they are reading. The teachers dress up as well and rotate into each others classrooms throughout the day to read the book they have chosen. 

In the morning, they have a serpentine parade where all the kids line up outside and every class gets to walk around and show off their costumes while holding up their book. My favorite part was how ALL the kids were involved, from the cute little kindergarteners to the big eighth graders, they high-fived each other and cheered as each class walked by. Most of the costumes were homemade, pulled together from things around the house, and it felt so much nicer to me than the usual store bought character costumes you see on Halloween.

Bee wanted to be Pippi Longstocking. We adore the illustrations in Lauren Child's edition. We happened to have a striped shirt and some striped tights and I cut a few squares of fabric and pinned them to her jumper for patches. A stuffed monkey made a perfect Mr. Nilsson, Pippi's pet monkey. 

The hair is really what makes Pippi unique. We took a wire hanger and bent it straight, then parted her hair in the middle and braided each side around the wire hanger. (It's a little awkward to work around the wire but you'll get the hang of it.) Secure with rubber bands and cut any excess wire at the ends. Then bend the wire up on each side so the braids curl up. Since Bee's hair is brown you couldn't really see the wire hanger at all. We drew some freckles on her cheeks with brown eyeliner.

C decided to go as Harry Potter since we were right in the middle of Book 1 last Halloween. Luckily his cousin had a costume already and all we had to provide was the shirt. (No weapons are allowed at school, but I guess wands don't count?)

Do schools around the country still celebrate Halloween? I am wondering this "no costumes at school" rule is just in Southern California? I understand that not every holiday needs to be celebrated in school, but I think this is a great way to celebrate reading and Halloween at the same time. 

Thursday
Oct042012

a book shower

To celebrate the upcoming arrival of my baby, my sweet friends asked if they could throw me a shower. I admit that I hesitated, since this was my fourth child... and really, I had everything I needed. But a shower gives you a rare opportunity to gather with friends and really take a moment to celebrate a new baby, and I always feel a little sad when my friends opt not to have a shower at all.

So we decided to have a book shower. Books are always welcome in our house, and I knew each and every gift would be put to good use by the whole family. My dear friend Emily who hosted the shower, found a beautiful illustration from an old copy of Huckleberry Finn and used that as the inspiration for the theme. It was perfect for celebrating the arrival of a new little boy. (Special thanks to my friends at Blonde Designs, who designed the invite.) 

Blankets were laid out on the grass, lanterns were lit, and friends settled in to enjoy a selection of pies. It was almost too pretty to eat. The pies were brought by different friends and included Harvest Berry, Lemon, Fresh Strawberry, Cherry, Rustic Apple, and Coconut Cream. They were all amazing and I think I ate leftover pie for breakfast for the rest of the week!

Little mason jars with tiny votives were hung above the buffet, cleverly tied through the wooden slats of the deck above. Some beautiful books were tucked under the pies and around the shower (picked up at the local library's used book store for 25 cents each). 

I was given so many wonderful books! My friends were worried that I would receive duplicates or books we already owned, so I made a wishlist on Amazon full of books I've wanted for years or new copies of books we've loved so well they are now tattered and torn. The kids were thrilled when I came home and showed them our new stash. I don't think I've ever been more excited about gifts!

As a favor, little bookplates were given to each guest. I took a pile for myself and added them to all the books I received at the shower. I love that these books will be with us for years to come, and each time we open them I will be reminded of my dear friends and this lovely summer evening. Thank you friends!

Thursday
Sep272012

the balancing act

Last January I spoke on a panel at Alt Design Summit about Work/Life Balance. And I've spent the last 9 month trying to follow my own advice.

I spoke at Alt about how I see the Work/Life Balance as a juggle. We have these balls in the air: jobs, kids, freelance work, family responsibilities, volunteering, husbands, hobbies, church obligations, housekeeping, blogging.. I could go on and on. 

But not all our balls weigh the same. Some are heavier than others, some are more fragile. There are some balls we can drop and then pick up a little while later. Some require more energy (and might not be worth juggling at all) and some balls we don't ever want to put down.

I think the most important part of living a balanced life is deciding which balls you need to keep in the air, and which you can set aside for a bit (or get rid of altogether). It's hard work to keep all those balls in the air at once, but we often feel that we need to. That we can somehow go on juggling and juggling forever.

In fact, when we are most busy, we often take on even more balls.. like that juggler at the circus who is already juggling three pins, a chainsaw, two flaming torches, and a bowling ball.. and then has a little girl toss in one more ball just to show he can manage. And usually he does. But every once in a while, that one extra ball is just too much and everything comes crashing down.

There are certain balls I just can't drop. And others I don't need to be juggling at all. And so I've stepped away from this blog for a bit. It's been nice to have one less thing to juggle. This blog was starting to feel like a job of its own, and I never intended it to be that. I've enjoyed just being with my family and not worrying about documenting every little thing. 

We had a lovely summer. Mid-July we had our fourth baby, a sweet little boy I'll call Lee. He is a doll with big blue eyes and long eyelashes, and universally adored by all. 

Before each new baby, I try to put a few balls down. I take a little break from freelance work, I try to keep the older kids schedules loose, and I volunteer for less. Then I can add that newborn into my busy juggle without losing my balance too much. It always takes me a few months and then I start to ease into my new balancing act, reevaluating each ball as I go. 

I'm already starting to feel like I can pick up a few of those balls I set aside. I've signed up for a few new book projects, though I won't get started on them for a few months. And I'm feeling like I can give a little love to this blog again.

We'll see how the juggling act goes. 

Image from one of our favorite alphabet books, Bruno Munari's ABC.

Monday
Jun042012

father's day

Bee had her last day of kindergarten today, so I am feeling particularly nostalgic. Yesterday I went into her classroom for the last time for a little graduation ceremony and to help the kids make Father's Day cards. We repurposed the Mother's Day cards we made with her preschool group last year. (To paraphrase something I once heard Paula Scher say.. "Have one good idea, then keep re-doing it.")

The trick is to draw the head and body for each child, so it fills up the page nicely and fits in the frame (I made these ones from heavyweight construction paper). Have your kids draw first with a pen or black pencil, just the outlines of ears, eyes, nose, mouth, hair, etc. Then use colored pencils or crayons to fill in the details. I loved watching the kids draw their dads, trying to remember how their hair looks, what color their eyes are, what kind of shirt he likes to wear. 

This is Bee's. I love how she decorated her frame.. I am sure her father will feel very loved! When we got home from school I had my 7 year old son make one too (in the green frame at top), I especially love the shirt detail. Then they both filled out the "What I Know About My Dad" questionairre I taped to the back. The kids were really so sweet as they tried to think of good answers to all these questions. My favorite answer of the day came from a darling little 5 year old when I asked her "One thing that makes my dad happy is...". She thought about it for a minute and then said "Just that he has me in his life." I told her that was the best answer I had heard all day.

If you feel so inclined to make your own, here is a template for the head, and the questionairre (which prints two to a page).